Can You Paint Vinyl Siding?
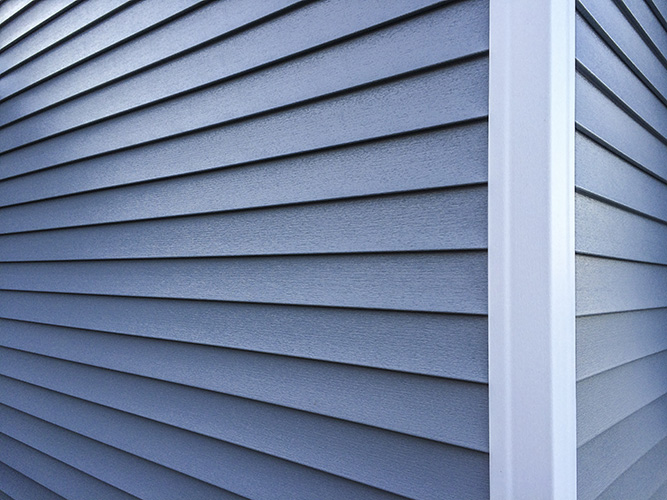 Vinyl siding is a hardened, durable plastic wrapping for your home used for waterproofing and aesthetic reasons. They are low maintenance and can last as long as 40 years if cared for properly.
However, after a couple of decades, they can fade and change color. The good news is that you can repaint your vinyl siding and make it look as good as new. However, vinyl can be finicky and not as easy to paint.
Our article answers all the questions you may have about painting vinyl siding, including the choice of paint, color, factors to consider, steps to paint, and much more.
Can I Paint Over My Home’s Vinyl Siding?
Yes! You can paint your vinyl siding. It is an easy and cost-effective way to update it as long as it is in good condition. With a new look, you can push the replacement for a few more years. Moreover, it also gives you the creative freedom to choose your colors. Painting your vinyl siding can give you long-lasting and great-looking results.
Is Painting Vinyl Siding Durable?
Though you can paint vinyl siding, it is not as long-lasting as the siding itself. Painting is just a temporary solution until you can get to replacing the siding itself.
A fresh coat of paint can last anywhere from 2-5 years. However, it depends on the weather conditions. The paint may fade quicker if you live somewhere with extreme conditions, like snow, direct sunlight, and humidity. And you may have to refresh often.
Factors to Consider When Painting Vinyl Siding
Vinyl siding painting can give your home a facelift and increase the curb appeal like no other. However, it is not that easy. You have to consider the below factors before your paint your vinyl siding.
Warranty
In most cases, the warranty is void if the siding is repainted, even a brand new one. Ensure that you check if it is in effect. Consult with your insurance agent before you decide to paint. However, you can paint if your warranty is expired or no longer valid.
Keep in mind that if your warranty is currently in force, the insurance agency may reject the claim if the vinyl siding is painted.
Cost of Painting vs Replacement
According to HomeAdvisor, the cost of painting the exterior of your home amounts to $1,687 – $3,907, while a new vinyl siding costs $5,000 – $14,050. Although the price of vinyl siding is higher, it comes with a 30-year lifetime guarantee. Furthermore, it has an ROI of 76.4%.
But, when it comes to painting, you may have to repaint every ten years. More frequently if your home gets exposed to inclement weather. Another point you may have to consider is that a poor paint job can take the appearance of the house from bad to worse.
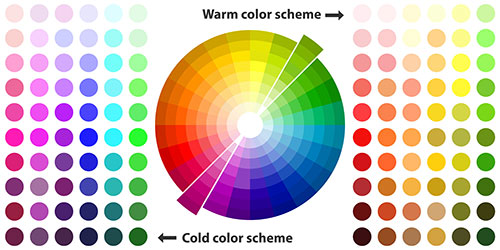
Paint Color Selection
If you decide to paint your vinyl siding, ensure that you choose the right color and the siding brand. Too dark of a color can cause the siding underneath to warp when exposed to sunlight. Ideally, the color you choose should be similar to the existing color or lighter.
Integrity of the Siding
Your siding serves as the first life of defense protecting your home against outdoor elements. With a new one, the professional contractor first inspects the home for any damage from pests, moisture, walls settling, etc. Any issues arising are fixed beforehand. On the other hand, painting vinyl siding can hide the damages from the moisture or pests causing mold, nesting, etc.
Insulation
Painting your old vinyl siding doesn’t do anything for the insulation except give your home a fresh look. However, if you change the siding, you add a layer of insulation underneath, improving your energy efficiency and durability.
Best Paint for Vinyl Siding
Not all paint will stick to vinyl. You need vinyl-safe paint from brands such as Benjamin Moore or Sherwin-Williams.
The best paint to use on vinyl siding is exterior latex urethane containing both acrylic and urethane resins. In addition, both the manufacturers mentioned above have paints specially engineered for vinyl siding with an entire palette of colors.
Vinyl Paint Formulas
The expansion and contraction of vinyl is the biggest challenge for paint formulators. For vinyl siding, choose a latex urethane paint that can flex with the siding. A paint that sets too hard cannot withstand the forces of the environment and weather.
Several paint companies manufacture a specifically formulated base for this task. The only remaining issue is the joints where pieces of siding overlap. Contraction during frigid winter may expose thin lines of unpainted siding.
Most Popular Paint Colors for Vinyl Siding
Selecting the color for the exterior of your home is essentially a decision based on personal tastes. Light and pale colors are generally a safer option. Moreover, it will help make a small house appear larger than it is. However, you can also go for medium transition shades for a contemporary look.
Here are some of the famous vinyl siding colors ranging from timeless neutrals to contemporary, bold shades.
 Autumn Red
- Coastal Blue
- Flagstone
- Desert Tan
- Granite Gray
- Light Maple
- Forest Green
- Linen White
- Newport Taupe
- Sable Brown
What Color Vinyl Siding Fades the Least?
Vinyl siding materials do fade over time. Darker colors fade much more than light shades. You’ll notice less fading with the light shade. White fades the least while deep browns and reds fade noticeably faster. While technological advancements have made dark colors fade-resistant, they still lose colors faster than whites and neutrals.
Can You Paint Vinyl Siding a Darker Color?
Darker colors absorb heat which is not ideal in the summer months. It can make the house hotter than it is. Moreover, they can also cause the vinyl siding to warp and burst open. They can also create maintenance problems. However, if you’d still prefer a dark shade, go for vinyl-safe paint from a reputed company. It should help keep your sidings safe.
Does Paint Stick to Vinyl Siding?
Vinyl resists regular paint. Hence you will need vinyl-safe paint. It sticks better and gives a smoother finish that lasts at least for a couple of years. Cleaning and prepping the surface will also result in a good paint job. Additionally, look to that you work in the proper climate.
How to Paint Vinyl Siding?
As with any paint application, a great paint job can give your home a new look. Unfortunately, bad painting can make your home’s appearance even worse. Here’s how you can paint your vinyl siding:
Step #1: Work in the Right Weather
To start with, paint in appropriate weather conditions for proper adhesion. A sunny, hot, humid, or windy climate may cause the paint to flake or peel off, as well as form cracks in due course. The ideal weather should be mild temperatures, low relative humidity, and an overcast sky to paint vinyl sidings.
Step #2: Choose the Proper Paint
The paint should be vinyl-safe from a premium quality brand. And not just any paint from the aisle. The paint should:
- Contain acrylic and urethane resins. It helps to accommodate the expansion and contraction of vinyl.
- Be the same shade or lighter than the existing siding.
Step #3: Prep the Surface
Start with cleaning the surface thoroughly. It gets rid of stains and grime off of your siding. However, a hose is not going to cut it. It would help if you had a power washer. You can purchase cleaner from the hardware store or use the following recipe for a cleaning solution:
- 1 gallon of water
- 1/3 cup laundry detergent
- 2/3 cup powdered household cleaner
- 1 quart (oxygen-based) liquid laundry bleach
Mis everything and apply with a sprayer. Use a soft-bristled brush and scrub by hand for best results. Then follow it up with a rinse and allow it to dry. Cleaning the siding is the crucial step towards achieving a professional-quality paint job.
Step #4: Mask Off Trim, Doors, and Windows
Mask your trim and hardware using masking tape and masking paper. Alternatively, you can also use plastic sheeting to mask off areas you don’t want to paint.
In case you are using a paint sprayer, tape the plastic over glass surfaces, windows, doors, and walls to protect them from the paint.
Step #5: Prime the Siding
Using a primer depends on the surface and also your personal choice. While some pros use it in almost all cases, others use it only when needed depending on the condition of the siding. Experts recommend using a primer only if the siding is pitted or shows signs of deterioration. In case you are using a primer, make sure that the paint you use is formulated to stick to it. A simple solution to priming is to follow the advice of your paint manufacturer.
 Step #6: Apply the Paint
Once the primer is dry, apply two coats, thin and even. After the first coat of paint is dry, go over again. But before that, use a brush to cut in around windows, doors, and corners. Then, use a roller for the rest. Finally, complete the process with a topcoat applied with a sprayer.
A brush or a roller may work for a smaller area. However, you may want to use a paint sprayer to make the process easier for a larger area.
Conclusion
Painting vinyl siding was impossible until a few years ago since most paints would not adhere to vinyl. However, the technological advancements in paint manufacturing have given a new look to vinyl. Unfortunately, vinyl has some unique characteristics making the application difficult. For the paint to last, you need proper prep work, priming, and also use vinyl-safe paints.
Painting vinyl siding is a laborious job, and if done right, the paint can last as long as ten years. In addition, repainting is less expensive than replacing and hence can save you money. Finally, make sure that vinyl siding is in good condition. Wash it regularly to get rid of mold, mildew, dirt, and the chalky residue that settles over time. Maintenance is the key to the paint’s longevity.
![]() Here at Wiese Painting, we are experienced with painting all colors, be it your apartment, home, or office. We guarantee that any hard-to-paint color or surface is tackled with professionalism and tricks that have been acquired through years of painting. You will love the look of your freshly-painted home, so contact us today for your free quote!
Here at Wiese Painting, we are experienced with painting all colors, be it your apartment, home, or office. We guarantee that any hard-to-paint color or surface is tackled with professionalism and tricks that have been acquired through years of painting. You will love the look of your freshly-painted home, so contact us today for your free quote!


